29 October 2010

Flassans sur Isole

L'automne sera l'occasion pour le village de Flassans sur Issole (après le Luc) d'accueillir
une manifestation commerciale autour du jardinage et du bricolage

DIMANCHE 31 OCTOBRE
PLACE JEAN JAURES
DE 9 H à 17 H

Exposants
:
grossiste en matériel (tondeuses)
pépiniéristes - pisciniste - fabricant gazon synthétique - paysagistes

Ateliers :
la préparation du jardin à l'hiver, du travail du sol, de l'hivernage des végétaux
conseils de tailles d'automne
construction de nichoirs, les légumes d'hiver et la biodiversité.

un marché paysan et un marché de produits artisanaux en relation avec le jardin.

27 October 2010

Our visit on 24/10/10 to Pepiniere de l'Armalette


Last Tuesday morning the Garden Group visited Pepiniere de l'Armalette in Sillans la Cascade. The nursery specialises in plants suitable for the climate in our area i.e. winter temperatures to minus 12 degrees C, with hot, dry summers.

The owner, Mr. Benoit Beauvallet guarantees that all his plants will survive the summer without watering, as long as they have been watered the first year. His assortment is quite unique. Most of the plants are hard to find elsewhere.

He mentioned that most Mediterranean plants do not flower in the summer. When you do see a plant flowering in the summer it most likely comes from California.


After our visit to the nursery, Jacquelyne Hodkinson invited us back to her house in Sillans la Cascade. I think we all thoroughly enjoyed the coffee, wine, cakes and sandwiches she and her husband had provided for us. We were very lucky that it was a sunny day and we could appreciate her lovely garden and beautiful views from her terrace.

I've made a list of the plants I can remember we came across. Please let me know what is missing and I'll add them to the list.

Artemisia lanata
Bupleurum fruticescens
Centaurea spinosissima, lovely rounded grey-green shrub:


Large selection of Cistus, to mention a few:
Cistus x purpureus
Cistus x skanbergii
Epolobium
Eragrostis trichodes - a grass, he suggested to mix with Zauschneria californica for effect.
Erodium manescaul 'Merstham Pink'
Large selection of Euphorbia to mention a few-
Euphorbia rigida:


Euphorbia amygdaloides
Euphorbia myrsinites
Euphorbia ceratocarpa
Glaucium flavum - a yellow poppy with leathery grey, indented leaves:


Glaucium rubrum
Iberis linifolia, a bi-annual, first year just the leaves, second year these lovely flowers:


Marrubium incanum
Onosma alborosea
Phlomis grandiflora
Putoria
Rhus typhyna
Rosa bracteata
Rosa sempervirens prostrata, a single white flowering rose that makes a lovely rounded shrub, 2 to 3 meter in diametre:


Rosa xanthina
Large selection of Salvia's to mention a few:
Salvia greggii
Salvia x jamensis 'Cherry Queen'
Salvia x jamensis 'Irene'
Salvia x jamensis 'Red Velvet'
Salvia microphylla 'Hot Lips':


Salvia spathaceae
Large selection of Santolina's to mention a few:
Santolina chamaecyparissus subsp. squarrosa
Santolina pinnata
Satureja amdena
Sempervivum 'Flamingo'
Scabiosa cretica
Stachys cretica - forms a cushion with deep green leaves. (looks quite a lot like a Salvia)
Stachys byzantina
Tanacetum densum
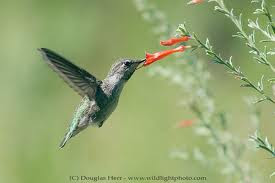
Zauschneria californica:


Photo's: Gerda Nagtegaal


25 October 2010

Dividing perennials


Perennial plants which form spreading clumps should be divided every few years to perpetuate the existing stocks and prevent overcrowding.Small clumps can be divided by hand or with a trowel. Larger clumps or very old clumps, however, have to be prised apart using garden forks.

Lift the entire plant out of the border and divide it in half. If it has a large matted root system, stick two garden forks back to back into the centre of the clump and force it apart.


Remove the young healthy shoots from the outer side of the clump by breaking or cutting them off.

Cut all the leaves right back to within 2.5cm of the roots and replant immediately, or pot up in potting compost and put the pots in a shady area until you can replant them.

Bibliography: Geoff Hamilton - Successful Organic Gardening


Planting a container raised tree or shrub


Dig a hole about twice the width of the shrub’s root ball. Top soil (top layer you first dig out) in separate pile from sub soil (harder and poorer in quality). Fork up the base of the hole (it allows water to drain and roots to penetrate soil). Spread some manure over the hole, covered with 15 cm of topsoil.

Mix the top soil with some manure and a couple of handfuls of bonemeal. Fork up the base and the sides of the hole.

Ease the plant out of its container, carefully loosening roots that have compacted whilst being in the container and place the shrub in the prepared hole. You can use a cane as a guideline, laying it across the hole, bearing in mind that you need to plant in a slight dip surrounded by raised edges for watering purposes during the first two years.

Backfill around the shrub with the top soil, firming the soil in stages to prevent air pockets from forming. Tread the surface around the shrub down into a dish shape so that water does not run off before it has time to penetrate the soil.

Prune any diseased or damaged wood back to healthy growth and cut back any inward-growing or crossing stems to an outward-growing shoot or bud. Water thoroughly.

You should also remove any very long, weak or straggly stems, or those that mar the overall balance of the framework.

Bibliography: RHS Encyclopedia of Gardening


Planting Bare Rooted Trees


Make planting hole bigger than root area of tree. Top soil (top layer you first dig out) in separate pile from subsoil (harder and poorer in quality). Fork up the base of the hole (it allows water to drain and roots to penetrate soil).


Place tree in hole, there should be enough room to spread out roots and it should be deep enough bearing in mind that you need to plant the tree in a slight dip, surrounded by raised edges for watering purposes. If a stake is required, work out best position so that it won’t interfere with the roots.

Remove tree before driving in the stake.

Spread a layer of manure in the base of the hole. Cover with 15cm of topsoil. Place the tree back in the hole and spread out the roots. Prune any broken roots back to healthy tissue, taking care not to damage the small fibrous roots. Plant the tree at the same depth as it was planted before – there will be an obvious soil mark on the bark.

Mix a couple of handfuls of bonemeal and some manure into the topsoil. Backfill around the roots, shaking the tree to settle the soil. Firm the soil with your foot to exclude air pockets, and tread the surface around the tree down into a dish shape so that water does not run off before it has time to penetrate the soil.


Water well after planting to settle the soil around the roots. For the first season keep the soil in the vicinity of the roots well watered and spray the foliage to prevent the tree from drying out and wilting.

Use a strap and pad to hold the tree firmly to a timber stake. A short stake tied at a height of 60cm will allow the tree to move in the wind while the root is held steady. The movement will thicken the tree trunk so that after a short time it will be able to stand without support.

Bibliography: RHS Encyclopedia of Gardening


05 October 2010

Trans en Provence

Foire aux plantes à Trans
le 10 octobre 2010 de 10h à 18h dans le village.

LinkWithin

Related Posts Plugin for WordPress, Blogger...