We started the afternoon with pruning what we thought was a climbing rose, it was not vigorous enough for a rambler. The best time to prune a climbing rose is in autumn to avoid damage to the branches by winter winds.
Normally a climbing rose is sold with several strong, long shoots. These should not be pruned till they have reached their allotted space. What should be pruned each autumn are the side branches that grow off the main shoots to 2 or 10 buds. It was a bit difficult deciding what to prune as this rose had been neglected for many years, we'll have a better idea next year.
Bulb Lasagna
The main subject was how to plant up a pot with several layers of bulbs. The height of the pot used was 33 cm with a width of 35 cm. A plastic pot was used, a clay pot would have been better, but would have been to difficult to move afterwards filled with earth and bulbs. Bulbs in a plastic pot are more susceptible to frost damage.
The bottom of the pot was filled with crocks. A compost specifically for plants in pots was used bought at Gamm Vert together with some handfuls of vermiculite mixed in. The pot was filled with earth to 20 cm below the rim.
The first layer consisted of 20 bulbs of late flowering tulips. They can be packed in quite close together but should not be touching. A tulip has a flat side and a curved side. The flat side should be facing outwards. The bulbs were covered with earth, + an extra 2 cm of additional earth.
Ready for the next layer. Again 20 bulbs of early or middle season flowering tulips were put in, just as mentioned above, again covered with earth + an extra 2 cm of additional earth.
Next a layer of 40 Muscari, again covered by earth till just below the rim.
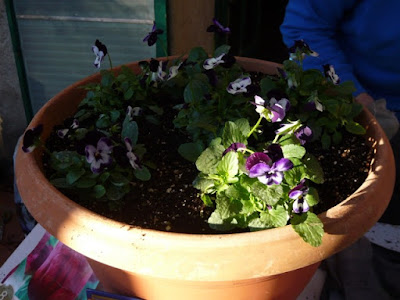
The last layer to put in were 6 small flowering pansies to make the pot more attractive during the winter months.
Water in well. Depending on the weather the compost in the pot should not dry out.
The bulbs inside the pot must not freeze, so during the winter cover the pot with bubble wrap or place it in a frost free area.
I planted up 1 pots with Narcissi and Muscari and the other with two different types of red Tulips and Mascara.
Below are the results:
Phase I
The results would have been better if I had chosen a smaller Narcis
Phase II
The Muscari has finished flowering, but the seedheads still look attractive
The second pot with tulips and mascari:


