31 January 2017

Hedges - 31 January 2017

Our first meeting of 2017 was held at Francoise McCredie.  Mavis gave a talk on hedges, the most suitable hedges for our climate.  The following are her notes.


Quote:

Why a hedge

  • Apart from being attractive a hedge creates a barrier helping to give privacy and lessening noise from traffic and neighbours.
  • It acts as a windbreak, reducing the force of the wind.  With a wall the wind hits the wall and is forced up over the wall, crashing down the other side with a greater force.
  • It can be used to hide unpleasant views.
  • Hedges can make strong and attractive divisions even inside a small garden.

Decisions

  • Your reason for a hedge will govern your choice of plants as well as the desired final height and width.
  • Will it be evergreen or deciduous?
  • Will it be flowering and loose growing or a formal monoculture neatly clipped.
  • Will it be made up informally of different varieties of shrubs often known as a tapestry hedge.
Preparation

  • First consider our climate and soil type.
  • Decide on final height.
  • Final width is important.   On the edge of a property the hedge must not grow over a pavement or road nor intrude over a neighbours boundry.
  • If a hedge is to be straight measure the length and bang in a stake at either end to fix a line for the central planting guide.  Remember to allow for final width, leaving space to prune both sides.


Planting
  • You should now have decided on your plant choice and bought in pots or bare rooted, the latter being generally cheaper but harder to source.
  • If bare rooted dig a trench the length of your guide line. For potted plants either space evenly in the trench or dig evenly spaced individual holes.

  • Spacing guide. Remember tall thin plants closer together than short spreading plants.  
  • Small hedges (Lavender, Rosemary etc.) average 40 cm height, space 30 cm.
  • Medium height hedges (Viburnum tinus, Pittosporum, Pyracantha etc..), height 110-150 cm, space 50 cm. 
  • Tall hedges (Oleander, Cupressocyparis, Taxus (Yew) etc.), height 180 cm plus, space 100-130 cm. Ask about spacing when buying plants.
  • The soil should be well worked over and weed free.
  • The depth of the holes or the trench depends on the size of the plants you have chosen.

  • The root ball should be loosened and the roots spread out as much as possible.
  • A sprinkling of fertilizer goes below the root system.
  • Do not plant in heavy wet soil as it could rot the roots.
  • Heel in each spade full of soil around the plant, with the soil reaching slightly above the level that was in the pot.
  • Make sure the top level of soil is well heeled in with your boot to secure the plant and stop it rocking.
  • Now water well. In the first year do not let the soil dry out, but do not overwater in winter
  • Dress with a complete fertilizer in the spring of the first year.
Pruning

  • In the first few years deciduous trees need a later winter trimming using secateurs.
  • Large leafed evergreens cut only with secateurs along a stem and not through the leaves as damage to leaves is unsightly and encourages disease.  Prune these in summer or after flowering.
  • Young evergreens (Yew, Leylandii etc.) prune lightly in spring, thereafter in summer.
  • Large formal hedges are cut using a motorized hedge cutter.
  • Always cut from the bottom using an upward sweeping action.  
  • The bottom of these hedges should always be wider than the top as this allows light to the bottom and stops the hedge becoming bare at the base. The hedge will then have a flat topped A   shape.  

  • For an even top one should have a line of string to follow. The day after pruning check that you have removed all the clippings from the top of the hedge.
  • Always remember to use protective clothing when using hedgecutters and a stable ladder.

Here is a rough guide to suitable hedge plants

Small hedges
Rosemary
Teucrium fruticans
Lavender
Santolina 
Hebes
Myrtle
Lonicera nitida

Lavender hedge

Medium height
Eleaegnus x ebbingei
Euonymus japonicus
Viburnum tinus
Photinia
Pittosporum tobira
Pyracantha
Prunus lusitanicus
Ligustrum ovalifolium
Escalonia ‘Iveyi'
Osmanthus heterophyllus
Berberis darwinii, or Berberis x stenophylla
Spiraea thunbergii
Abelia –

Pittosporum tobira

Tall
Oleander
Cupressacyparis leylandii
Taxus baccata (yew)
Chamaecyparis lawsoniana
Thuja plicata


Hedera helix

Ivy makes an attractive barrier if planted against a wire fence and then threading each piece of ivy stem horizontally through the mesh. Do this for the depth and the length of required coverage.

When established the ivy should be cut back with secateurs in spring to thicken the growth.


Ivy Hedge

Useful website bearing in mind that it is English and not all suggestions are suitable for our climate, rhs.org.uk hedges

Unquote.

Text: Mavis McQuade
Photos: Web + Mavis McQuade


30 October 2016

Flower arrangements for Christmas by Rens Korting, together with a pot-luck lunch, 25/10/16


Recently we've been holding our winter meetings at Françoise McCredie's charming residence in Cotignac. She is so welcoming. This was the first indoor meeting after the summer and normally we  start the season with a pot-luck lunch.  We were very lucky that this time we had Rens Korting devoting one day of her holidays to give several demonstrations of how to make an attractive flower arrangement for Christmas.


Françoise and Jean next to the greenery used in the arrangements

Unfortunately it was raining most of the day.  Our plans to hold the demonstration outside had to be changed at short notice. The kitchen was used and because of its large central work station it turned out to be ideal.

Some of the utensils used: a rope for a garland, a wreath, secateurs to cut the branches. etc.


Rens


Françoise had laid the table for the members.  Normally we take our own tableware, cutlery and glasses but this time they were all provided for.


We'd asked Tineke to make photos so that all our members could use the photos as examples.

The finished circular arrangement and the wreath

The first example was a circular arrangement, the same method can be used for a rectangular shape:

If you use 'Oasis' for the arrangement, you need a basin filled with water, you drop the 'Oasis' into the water and let it soak up the water till it is saturated.

The saucer with the prongs to hold the 'Oasis' 

The prongs are glued to the saucer with pieces of double sided tape

Melting the tape a little for a stronger adhesion

You place the 'Oasis' on the prongs. Cut off the edges to make the shape a bit more rounded. The first branches are pushed into each side of the 'Oasis'.

You finish of the basic structure with putting another branch on the top of the 'Oasis'. If you use a particular branch on one side, it looks nicer to do the same on all the sides.

Examples of greenery you can use i.e. branches of Ivy, multi-couloured ivy leaves with stalk, branches of different types of conifers, Pistachia lentiscus, Phillyrea angustifolia, in fact any evergreen shrub or tree growing in your garden or area. Cut a piece of the branch, and shape the end into a point.

The smallest size of wire should be used when attaching leaves to the arrangement

To use a leaf in the decoration you use the end of the wire as a needle, your thread it through either side of the central vein, you twist it round the stalk and the other bit of wire, you cut off the wire to the length required, then push it into the 'Oasis'.

Small fruit can be used by pushing it onto a wooden BBQ stick normally used for kebabs

Work in progress

To make a bow, it is easier to used wired ribbon, you fold it into the shape of a bow

You wrap a length of wire around the centre of the bow, then twist the 2 ends of wire together to be able to push it into the 'Oasis'

The second example was a wreath for a door.  There was not enough time to finish the wreath, Rens showed us the principles of how to go about it.

Wreaths are available nearer to Christmas at 'Gamme Vert'


To hide the straw of the wreath you cover it with green plastic. It comes in a roll.  If you cannot find it you can use dustbin bags cut into strips. When you come to the end, fasten it with a bit of insulating tape. You need about 3.5 metres of plastic wrap.

Next, make a hook to hang the wreath.  You use pliable wire on a spool to create the hook.  When you have finished making the hook, fasten a bit of string to the hook to find the hook later, after you have covered the wreath with greenery.


Make a small bouquet with different bits of greenery, then bind it together with the pliable wire.

Fasten the bouquet with pliable wire to the wreath

One bouquet on the outside, the next one on the inside, both at a bit of an angle fastened with the wire

An apple on a BBQ stick, just push it into the wreath

Another example of how to fasten the bouquets to the wreath

The finished wreath

How to make a garland:


You need a piece of rope, quite thick or otherwise like in this case you wire two bits of rope together. Make a large loop at the end to hang it on a hook or door handle.  A hanging garland is easier to work with.

Cover the rope with plastic, the same way as for the wreath

Make small bouquets the same way as was done for the wreath. Attach the bouquets to the rope with pliable wire on a spool just as was done for the wreath.

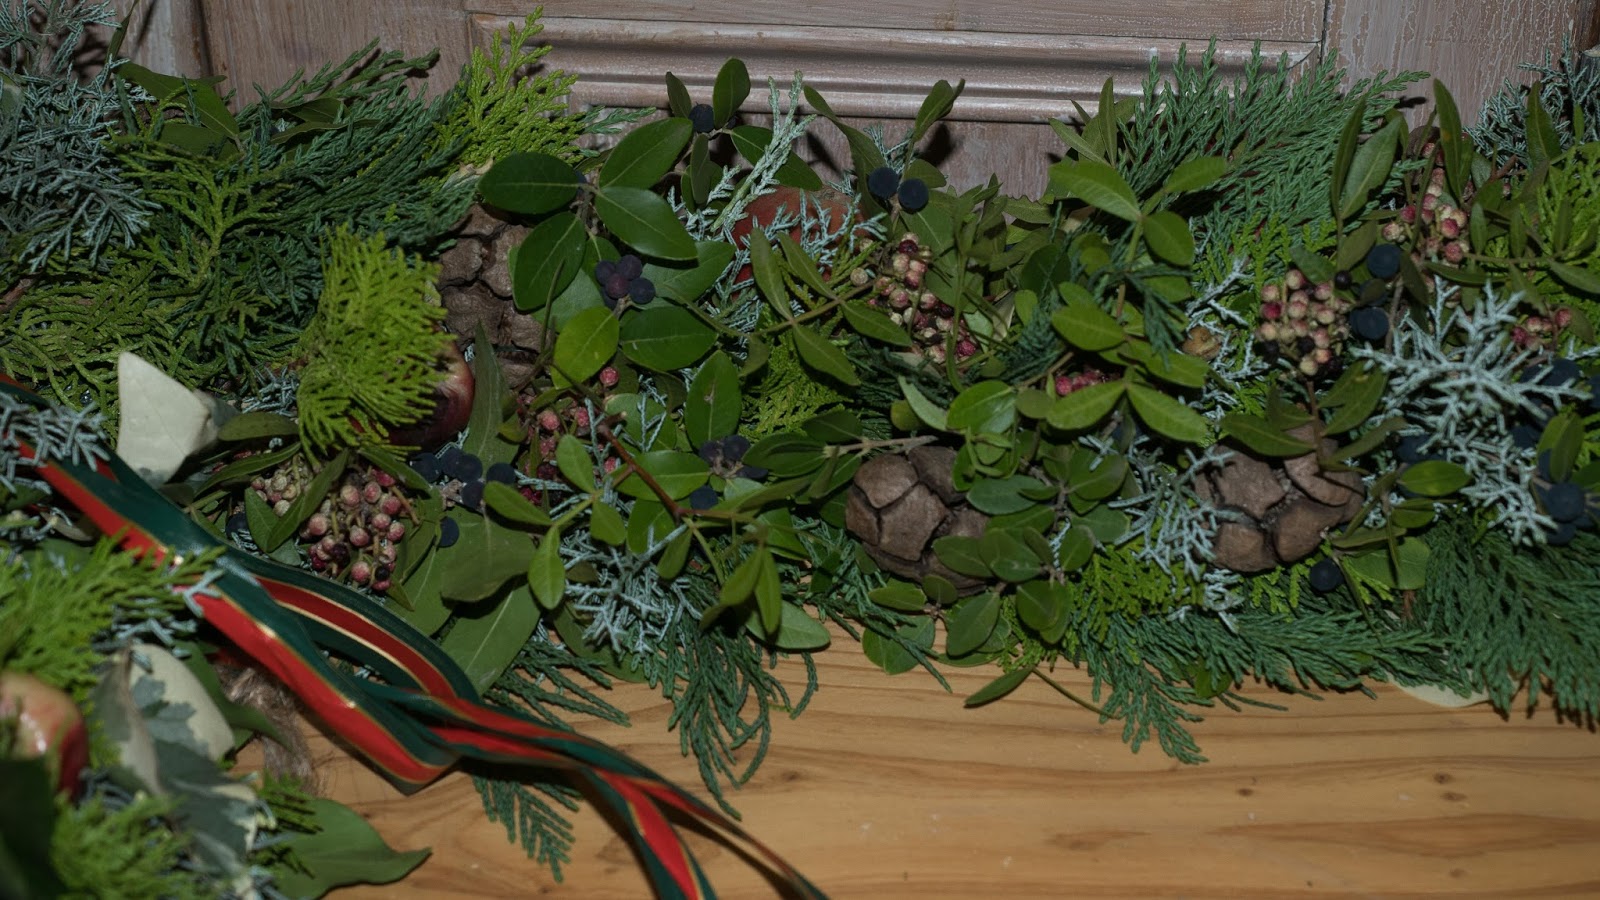
Finished garland

You may want to attach a double bow to the arrangement

Behind the normal bow, you form another loop

and another loop


you pinch the loops together, wrap the wire around the middle

Finished bow

Rens with our thank you present

At our next Garden Group Meeting on 29 November, I'll bring along some prongs to use for the round or rectangular arrangement, let me know if anyone is interested.

Photos:  Tineke Stoffels, a big thank you for the detailed photos.


LinkWithin

Related Posts Plugin for WordPress, Blogger...