13 May 2019

Our April visit to La Serre du Plan in La Garde, 16 April 2019


On the Carces Plant Fair in May 2018 we met Mr. Ferry Vlaar with his collection of herbs.  We were so impressed by the variety and quality of the herbs that we said to each other 'it would be a good venue for our garden group to visit his serre'. After a bit of research by Sue we found out his address and were able to contact him to plan our visit.


The two people who started La Serre du Plan are:

Ferry Vlaar, originally from The Netherlands, whilst studying for his mechanical engineering degree, to earn some extra money, worked for a tulip grower.  One day the owner asked him if he would be interested joining him in a venture 'growing tulips in the south of France'.  He accepted the offer and arrived in Carqueiranne in 1993.  The collaboration did not work out in the end but Ferry Vlaar stayed on in France continuing to produce tulips and other cut flowers.


Alexandra Stihl Vlaar, originally from Germany, comes from a family of horticulturists and more or less grew up in a greenhouse so to speak.  After her horticultural diploma, to gain more experience she worked in the production of ornamental flowers with all that entails. In 1993 she as well decided to move to the south of France and initially worked for a company that produced plugs, young plants.


In 1995 the two met and started working and living together.  In 1997 they married and up to 2009 they grew flowers and foliage for cut flower industry. For commercial reasons they stopped and started what they are doing today.

They moved to La Garde and opened 'La Serre de Plan', Alexandra in charge of growing herbs and Ferry grows strawberries, forever searching for the tastiest and largest varieties.
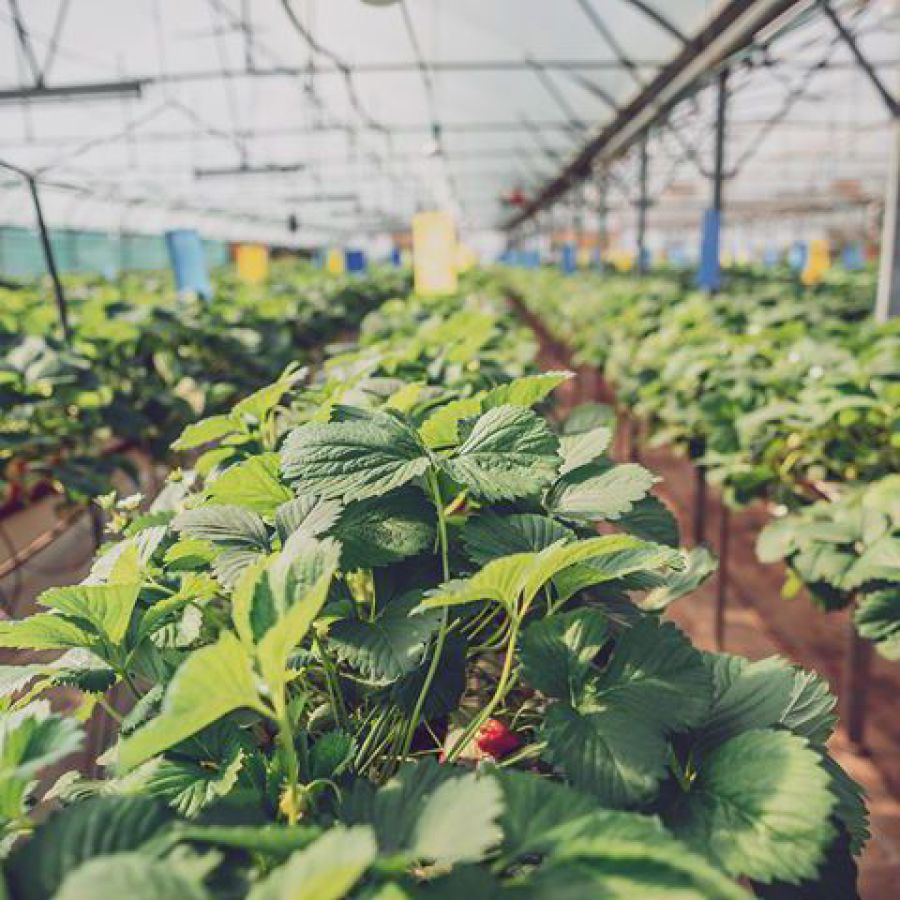


Strawberry variety 'Charlotte', Ferry Vlaar's new selection, sweet, juicy and large


To make growing herbs from seed easier, circular disks with inbedded seeds are available for the industry. The disks and pots are of an exact fit.


Basil from seedlings to plants:


Purple Basil

Alexandra grows 8 different varieties of chillies with varying degrees of hotness. Below is the Scale of Scoville that measures the pungency of the chillies.


A new variety this year, 7 on the Scoville Scale


Another interesting herb is Vietnamese Coriander.  It tastes quite a lot like Coriander although it belongs to a total different family. Its Latin name is Persicaria odorata


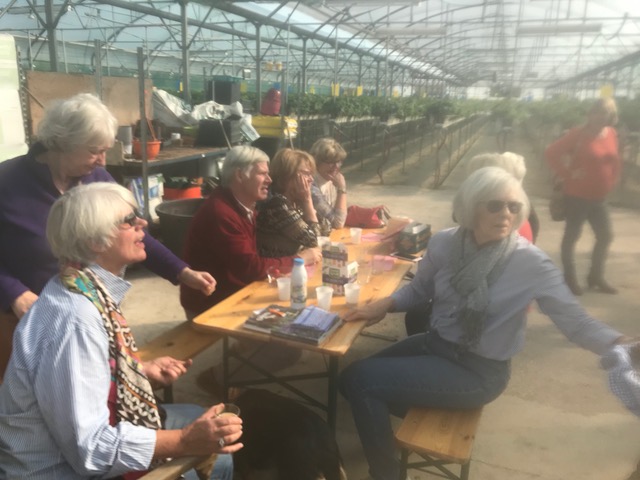
After our visit which was very successful as well for La Serre du Plan as for us (everyone of us bought several plants), Alexandra served coffee and Sue had brought along her delicious carrot cake and shortbread biscuits equally nice.


Ferry Vlaar will be at the following foires in 2019:


Photos:  Gillian Philips, Mavis McQuade and La Serre du Plan

26 April 2019

Making a Herb Garden - 26 March 2019

An introduction on how to design a successful herb garden by Mavis McQuade


I thought I would do a talk on making a Herb Garden.  Herbs are a large subject and historically they have been used for hundreds of years. Saskia has already given us talks on using herbs for medecine and cosmetics and I've thinking about them from a culinary point of view hence a talk on producing them in our gardens.

Making a Herb Garden

We are lucky here in as much as many of the most used herbs are common to our climate and many are happiest in alkaline soil.  Also the terroir cuisine here makes full use of them - what would we do without Thyme, Rosemary and Bay?

There is nothing nicer when cooking than just popping in the garden for the necessary fresh herbs.


Planning

Position

If possible it is best to have your herbs close to the kitchen door.  It is no fun having to go way down the garden in the dark or pouring rain.  Neither does one want to walk too far for a bayleaf or a sprig of thyme.  Of course one can have herbs dotted all around the garden but a patch devoted can be very attractive and practical.

When you have decided on your position, size and shape, it is a good idea to define it with an edging. This can be made with stones, wood, or better still with plants themselves.  I will not recommend box though very attractive, it now has problems with caterpillars and box blight and needs work in clipping.


Better still is to have something more natural.  When I first started mine I took seedlings of our native thyme from my wild terrace.  They grew quite quickly and were successful for a number of years looking pretty when flowering and attractive to the bees. When they got too old and woody I started replacing them with Teucrium chamaedrys (Germander) which can be trained like a miniature box hedge and also flowers dark pink. I bought one plant and have been making cuttings regularly but I have now found the stems are rather brittle.  Of course doing it this way takes time but is rather satisfying.  Unfortunately this year I did not get round to clipping it back so it is rather straggly.

Soil Preparation

Most herbs are happiest in alkaline to neutral soil so dig over your patch and improve it if necessary with compost.  Do not take out all the small stones as these help with drainage.

Nearly all herbs need a good amount of sunshine, very few will grow in shade, neither do they like strong wind.

They should survive without added fertilizer though in autumn or spring I give a top dressing of fumier de mouton.  Water about once a week depending on weather.


Spacing

Most herbs need little space  but if your bed is deep a few carefully placed stepping stones help one to pick the herbs you require without doing too much damage.  I have a path behind and the front of the bed goes on to gravel.  If the bed is against the wall put taller plants like Bay or Fennel to the back of the bed.  A Bay tree grows quite large and needs clipping so it needs space to grow and receive attention.

Also herbs can be grown successfully in a walled raised bed, pots and planters.  One can also keep a patch free to scatter a few seeds like Parsley, Coriander and Rocket.

You are now ready for planting.  Make sure you plant herbs with woody stems deeply, up to the foliage.  One can put a mulch down after planting which makes the herbs more distinctive and also keeps the moisture in.

Lists of Herbs

Plants for edging

Buxus - Box
Santolina
Lavandula - Lavender
Thymus vulgaris - Native Thyme
Teucrium chamaedrys - Germander

Basilicum

Culinary Herbs

Ocimum basilicum - Basil
Laurus nobilis - Bay
Anthriscus cerefolium - Chervil
Allium schoenoprasum - Chives
Carum carvi - Caraway


Coriandrum sativum - Coriander
Anethem graveolens - Dill
Foeniculum vulgare - Fennel (Bronze fennel)
Allium sativum - Garlic
Origanum unites, O. marjoram, O. vulgare - Marjoram

Basil & Sage

Mentha rotundifolia - Mint  (Apple Mint) - spreads like mad (can sink a large plastic pot)
Mentha spicata - Spearmint
Origano - see Marjoram
Petroselinum - Parsley,  2 types flat and curly

Parsley

Rosemarinus officinalis - Rosemary
Salvia officinalis - Sage
Satureja hortensis - Summer Savory
Artemisia dracunculus (French variety) - Taragon
Thymus vulgaris - Native Thyme


Attractive Plants for a Herb Garden

Artemisias
Camomile
Lavandula - Lavender
Calendula officinalis - Marigold (pot M)
Trapaeolum majus - Nasturtium

Calendula officinalis

Photos: Landscape Photos and fresh herbs all from Mavis's garden.

30 January 2019

Tips on how to grow successfully plants from seed

Now is the time of the year when gardeners start looking through seed catalogues choosing which plants they would like to grow.

Seeds can be ordered from various companies on line or bought in garden centres, but if you want to grow something different and interesting, 'Chiltern Seeds' based in England is a company I would recommend. They are set up to send seeds abroad.


Why should you choose seeds rather than buy plants in a garden centre.


  • Diversity - You have a much wider selection of varieties to choose from.  For example Chiltern Seeds has 20 different varieties of Basil and over 20 varieties of Sage to choose from, much more than you will ever find in a garden centre.  In addition seed companies offer unusual plants that you do not find in the garden centres.
  • Save money - It is much cheaper to grow your plants from seed, especially if you have a large garden.
  • Satifaction - January is probably the worst month of the year weather wise, often too cold to work in the garden. It is also the month in which seed catalogues for the present year become available. Selecting the seeds you want to try this year, to see them germinate and turning into plants gives enormous satisfaction.

So what do you need:
  • You'll need something to grow the seeds in, this can be a tray, an old plastic icecream container, plastic trays that contained salad leaves or fruit or just used plastic pots.   Makes sure you pierce holes into the bottom for drainage.  

  • A container larger than your seed tray.  When you want to water the seeds, you should not water them from above, but place them in a larger container that is filled with some water.  Place the seed tray in the larger container to moisten the soil from the bottom. This way you do not disturb the seeds or wet them by watering from above which can cause damping off,  a fungal infection encouraged by damp conditions.

  • If you are using trays and pots that have been used before, wipe the pots with 10 parts of water to 1 part bleach.

  • Potting compost.

  • A piece of glass or plastic (can be clingfilm) to cover the tray.


How to sow:


  • Empty some of the sowing compost in the middle of the tray and spread it out  till your tray is filled, level it and firm it lightly so that the soil is about 1 cm below the rim.


  • Sow seeds thinly in rows, 1/2 cm apart. Sowing too densely may result in thin, spindly plants and possibly damping off, a fungal infection.
  • Fine seeds and those that need light to germinate do not normally need to be covered with soil.  The general rule is that you sprinkle the seeds with a thin layer of fine sieved compost to the depth of 2 x the size of the seed.


  • Label and date the container, place the seed tray in a tray of water to dampen the soil and to prevent the seeds from dislodging. 
  • Minimize evaporation by covering the container with glass, plastic or a sheet of cling film.
  • Place them in a cold frame or serre or in an area of the house that received a lot of light.
  • Protect the seedlings from too much sun by providing some shade with newspaper.

What to do when the first leaves appear:

The first leaves that appear are the embryonic leaves (Cotyledon). Two primary leaves. These are not the true leaves of the plant.  The true leaves normally appear after an additional 14 days, depending on the conditions of where the tray is kept.


Once the true leaves have emerge, it is important to prick them out and transfer the plants to another tray or pots.


When pricking them out with a dipper or pencil, hold the seedling by the leaves, never by the stem or roots.


The new pot or tray should be prepared, filled with compost, firmed up and with a receiving hole (made by the pencil) for the seedling to minimize the transfer time.

Place the tray in another tray filled with some water to dampen the soil.  After a few weeks the plant will have developed into a full grown plant ready to be transferred into the soil (if frost has passed).
In the meantime trays and pots can be put outside during the day and taking inside during the night or cover them with fleece.  This way they slowly toughen up.


There are a lot of seed companies to choose from, 2 that I would recommend:
www.chilternseeds.co.uk
www.sarahraven.com

Both supply free catalogues of their products.

Photos: Web
Info:  RHS Encyclopedia of Gardening + Web 


06 January 2019

Fruity Cocktails - Guacamole


For the second year running we were lucky to have Gillian Duffy, culinary editor of New York Magazine, make some suggestions for drinks and edibles, very useful for this time of the year.

Sue busily preparing some nibbles.

Françoice McCredie very kindly, once again, allowed us to use her kitchen for the demonstrations.


VIN D’ORANGE - MAKES 8-10 SERVINGS
As featured in Hors d’Oeuvres - Simple, stylish, Seasonal by Gillian Duffy

4 medium oranges (unwaxed)
1 bottle Provencal rose wine
½ cup cognac
½ cup sugar

Scrub the oranges then strip off the orange zest with a vegetable peeler avoiding the white pith, and add to the wine. Recork the bottle and set aside in a cool place for 15 days. Strain the wine, stir in the cognac and sugar, and serve.
========


Gillian preparing the Sparkling Holiday Punch


SPARKLING HOLIDAY PUNCH (makes 1 serving) or 4 servings
As featured in Hors d’Oeuvres - Simple, stylish, Seasonal by Gillian Duffy

3 ounces (6 tablespoons) fresh orange juice (12 oz)
3 ounces (6 tablespoons) pineapple juice (12 oz)
½ ounce (1 tablespoon) fresh lemon juice  (2 oz)
1/2 ounce (1 tablespoon) raspberry or strawberry  syrup (2 oz) (or to taste)
Dash Angostura bitters
3 ounces (6 tablespoons) sparkling brut (alcoholic or nonalcoholic) (12 oz)

Garnish -Sliced orange and lemon
Mix together the first five ingredients in a goblet or pitcher if making larger amounts and top with the sparkling brut. Garnish with wheels of orange and  lemon.

========

Gillian with the Limoncello

LIMONCELLO

5 unwaxed lemons
1 liter bottle vodka or grain alcohol
3 cups white sugar
4 cups water

Scrub the lemons under hot water set aside to dry. Pare the zest from all the lemons with a  peeler, taking care not to include any white pith. Put the zest in a large clean jar and pour over the vodka. Cover with a tightly fitting lid and leave for a week, shaking the jar each day.
After one week, make the simple syrup by combining the  sugar and water in a medium saucepan. Bring to a boil. Do not stir. Boil for 15 minutes. Allow syrup to cool to room temperature.
 Add the sugar syrup little by little  to the vodka and peels until you achieve the desired sweetness, and leave for a further week, shaking the jar regularly. Strain into decorative bottles, adding a few strips of lemon zest to each bottle. Keep in the freezer.
========

Sue with helpers June Lynn & Betty

CRANBERRY PINEAPPLE PUNCH (Serves 10 cups)

3 cups (24 oz) pineapple juice, chilled
3 cups (24 oz) cranberry juice, chilled
4 cups Ginger Ale
½ cup fresh or frozen cranberries
½ lime, thinly sliced
Ice
In a large jug or punch bowl, stir together the pineapple juice, cranberry juice and ginger ale.
Add the cranberries, sliced lime and ice. Stir gently to combine and serve over ice.

Note: Add some vodka or rum if you need a little kick to the drink.

========

Gillian stirring the Rum Punch

RUM PUNCH (Serves 1) My husband’s favorite version of a traditional West Indian Rum Punch as featured in Hors d’Oeuvres - Simple, stylish, Seasonal by Gillian Duffy

Juice of 1 lemon
2 teaspoons instant dissolving sugar or simple syrup
3 ounces (6 tablespoons)rum
4 ounces  (½ cup) water
Ice cubes
Goslings Black Seal Rum (optional)
Garnish: whole nutmeg for grating

In a cocktail shaker, combine the lime juice and sugar or simple syrup, stirring. Add the rum and water, shake well and pour into a tumbler filler with ice. A floater of Goslings Black Seal Rum can be added if desires.
Grate a little fresh nutmeg over the top of the punch.

========

Gillian and Betty preparing the Guacamole

GUACAMOLE (Makes 8-10 servings) Recipe based on Josephina Howard’s famous version from Rosa Mexicano and featured in Hors d’Oeuvres - Simple, stylish, Seasonal by Gillian Duffy

4 teaspoons seeded and minced fresh jalapeno or Serrano chili pepper
⅔ cup white onion in ¼ inch dice
3 to 4 tablespoons minced coriander
¾ to 1 teaspoon salt
2 medium avocados, preferably Haas
4 tablespoons diced tomato, seeds and interior ribs removed
1 tablespoon fresh lime juice (optional)

Corn chips for serving
In a mortar combine 2 teaspoons chili pepper, ¼ cup onion, 2 teaspoons coriander, and ½ teaspoon salt. Mash with pestle until the mixture forms a wet paste.
To cut the avocado, hold it in one hand and cut a full circle around the seed with a knife, then twist the halves in opposite directions to separate them. With the blade of a heavy knife, strike the top of the seed, give the knife a slight twist, lift the blade, and the seed will come with it.
With the tip of a small knife, cut the avocado flesh into ½ inch dice, do not cut through the skin. Lift the flesh from the skin with a spoon to avoid mashing, and add to a bowl. Gently stir in the paste from the mortar.
Add the remaining onion, coriander, the tomato, and 1 teaspoon peppers at a time, tasting with each addition, and stir carefully. Adjust the seasoning to taste with salt, coriander and peppers.
Serve immediately with corn chips. Add lime juice if the guacamole is not served immediately.

Gillian Duffy
Culinary Editor
New York Magazine

Photos - Mavis McQuade


04 November 2018

Garden Group Pot Luck Lunch - 30 October 2018 - Making a Winter Container


Now the skies are getting greyer and the garden is short of colour it is a good time to brighten things up with winter containers either in pots for the terrace or troughs for window-sills. 
The principals will be the same whichever type of container one uses. I am doing something simple with easily available plants at this time of the year but one can have fun doing more imaginative things and also prepare something festive for Christmas.


Choosing a container.

Terracotta or wood are probably best as they are not as cold as plastic . To help with insulation one can line the inside of the container with sheet plastic remembering to make drainage holes in the bottom. 

Pots standing on the ground are better raised up with terracotta feet, wood blocks or flat stones, this lets air circulate and raises the container from the cold ground also helping drainage.

In the bottom of the container put some crocks, stones or pieces of polystyrene to help with drainage.

Make a mixture of potting compost and grit .


If using bulbs in a mixed arrangement put a layer of this in the bottom of the container.


Having worked out a selection of plants, arrange them in the container and note spaces around them for the chosen bulbs, in this case small daffodils tête à tête and purple and white crocus. 

Remove the plants and place the bulbs in desired position and then fill the container to within 5 cm. of the top of the container. Now dig in your plants being careful to avoid the bulbs and fill soil firmly around them. Place the container in position and spray lightly with water.


Choosing Plants.

When choosing your plants remember that they grow very little in winter so have them big enough to make an impact.

Look for plants with complementary colours, interesting blends of leaf shapes and textures and have height variations. On the other hand one might want to make a splash  of colour with one type of plant such as cyclamen, pansies or polyanthus.


The plants  used were in the bottom layer Crocus and Narcissus 'Tête à Tête, then after another layer of earth in the middle at the back a bright green Chamaecyparis for height.  It should have been a taller specimen but unfortunately could not be found, then the rest of the trough was filled up with Pansies and Cyclamen finishing off with ivy lin the front, hanging over the trough.

For a different look instead of the Chamaecyparis a red Cordyliine and then fill up the trough with deep pink heathers, silver leaved Senecio and Calocephalus 'Silver Bush\.

If you are doing a round container and it will be against a wall put the tallest plant at the back, but if it is open to view all the way round put the tallest plant in the middle and arrange shorter plants around it.

Remember to place the container where it will get the best of the winter light.

The plants will grow slowly and do not need feeding as this would encourage new growth which would be soft an susceptible to frost.

Check soil regularly and water carefully neither over or under watering.

As plants grow remove dead stalks, leaves and flower heads.

Remember that many of the plants I will list can grow on in the garden after the winter container is over.


When planting it is a good idea to put your container in a tray. When filling up with earth the spillage will stay in the tray. 
            

List Of Suitable Plants

Bulbs and Corms
Tulipa 'Red Riding Hood'


Crocus
Narcissus, small (like Daffodil tête à tête), 
Muscari ( Grape Hyacinths),
Scilla bifolia or similar small varieties,
Cyclamen coum, 
Anemone blanda, 
Tulipa, small tulip varieties.


Flowering Plants

Ajuga reptans 'Atropurpurea', the leaves of Ajuga come in green or reddish tints


Viola, Pansies large or small varieties
Ajuga reptans, 
Glechoma hederacea 'Variegata' ( variegated ground ivy) 
Polyanthus 
Ophiopogen nigrescens
Helleborus nigrum

Small Evergreens


Calocephalus 'Silver Bush'

Hebe
Erica - Heathers
Hostas
Heuchera
Nandina domestica
Skimia japonica
Senecio
Cordyline
Euonymus
Gaultheria procumbens
Calocephalus 'Silver Bush' 
Juniperus
Chamaecyparus.

Grasses 


Festuca glauca

Festuca glauca
Carex.

Ivy

Hedera, various

Ferns

Asplenium scolopendrium


Polypodium vulgares
Asplenium scolopendrium
Polystichum setiferum.

Herbs


Salvia officinalis 'variegata'

Salvia - Sages (variegated) Parsley
Rosmarinus (rampant)
Helichrysum - Curry plant  

Ornamental Cabbages.

Presentation, text and photos by Mavis McQuade
Some photos from the Web


LinkWithin

Related Posts Plugin for WordPress, Blogger...